Portal Gun Tutorial Series - Creating the Portal Gun - Setting Portal Rotation | Part 3 UE4


Hey guys! In this part, I set up the portal shooting gun, which will shoot the Portals where the player is looking at. The line trace will be a bit off the HUD if the surface is too far away from the player, but it shouldn't matter too much if you make the player HUD bigger!

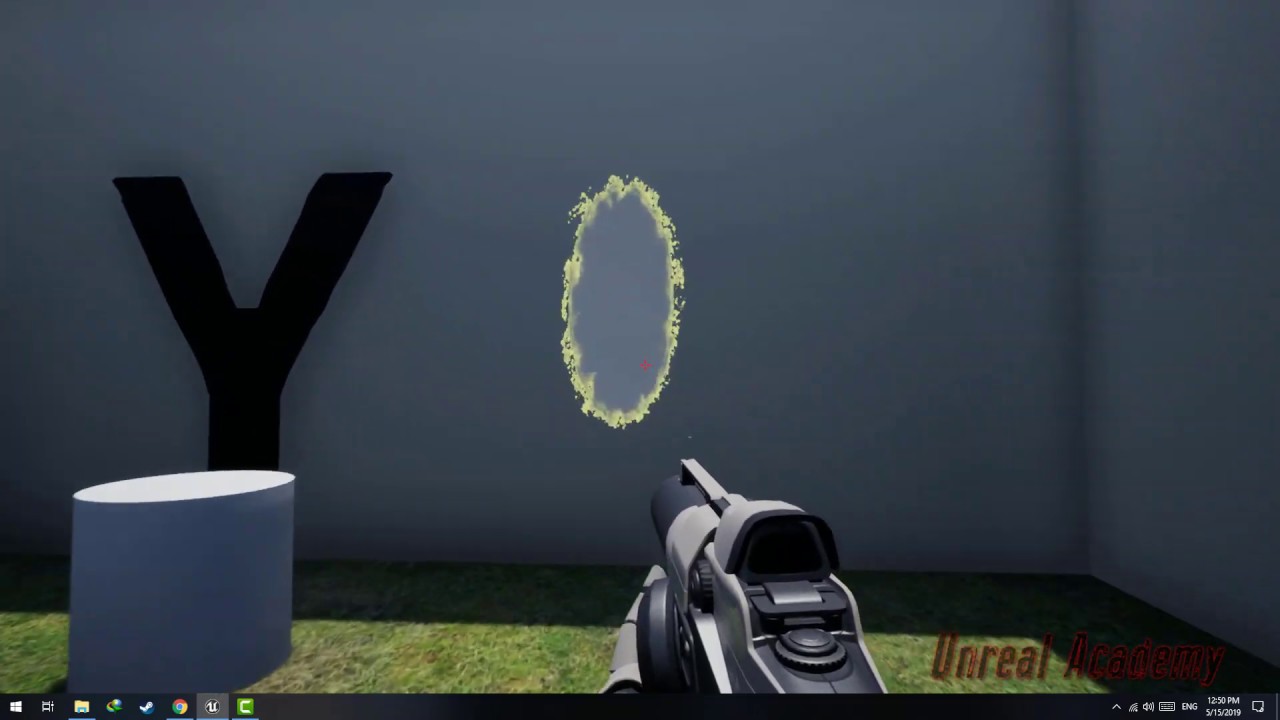
I also tell you how to ensure that when the Portal is spawned, it is spawned facing the rotation of the player! Sadly, the rotation of the Portal has to be pre-defined, so that means that you can only use "straight" walls, and not "slanted" or "tilted" walls, because later on in the series, when I tell you how to set the rotation of the player upon teleport to face forward, and how to retain player velocity on teleport, I'm only going to be setting the values based upon the forward vector of the portal. So if the forward vector is anything other than -1, 0, +1, the functions/code will not work!


Download the Portal 1 & 2 shooting Sound effect from here:

Sounds.rar | Mediafire

P.S: These sound effects have been taken from the game Portal 2. Please do not use this in the final product as you might get a copyright notice!

Unreal Academy Game Developer

I like to develop games and help other people achieve their dreams of Game Development as well! I hope you'll find my blog useful, and if you do, please do not forget to subscribe to me on YouTube and watch an ad to support me!

Portal Gun Tutorial Series - Setting Up BP - Variables And Render Target | Part 2


Hey guys! The first part is finally out! In this part, I set up the blueprints, variables, and functions that we will be using later on in the portal gun Unreal Engine 4 series. I also fix the Render Target Rotation so that it matches players rotation, causing the teleportation to be seamless, making the portal seamless!


Timestamps:

  • Overview: 00:00
  • Pre-Requisites (YOU MUST ENABLE THESE SETTINGS TO MAKE THE PORTAL SYSTEM WORK!): 0:20
  • Setting Up Functions + Variables in your character Blueprint: 00:50
  • Creating Portal 1 Blueprint + Setting up it's functions, variables and components: 02:20
  • Setting Up Render Targets: 06:45
  • Testing If It Works: 11:45
  • Disabling Collision: 12:20
  • Fixing Render Target Rotating With Player Rotation: 12:50
  • Drawbacks + What to expect from next video: 20:35
Download the PNGs for the Portal FX material here:


Unreal Academy Game Developer

I like to develop games and help other people achieve their dreams of Game Development as well! I hope you'll find my blog useful, and if you do, please do not forget to subscribe to me on YouTube and watch an ad to support me!

Portal Gun Tutorial Series - Part 1 - Overview, Features & Limitations | UE4


Hey Guys! In this video, I give you an overview of the portal tutorial series that's going to take place, what it's limitations are, and when the series will begin! Hopefully, this will help you decide whether the tutorial is what you guys are looking for!


Unreal Academy Game Developer

I like to develop games and help other people achieve their dreams of Game Development as well! I hope you'll find my blog useful, and if you do, please do not forget to subscribe to me on YouTube and watch an ad to support me!

Portal Gun (WIP) Progress Update! | UE4


Hey guys! This is a followup video. In the previous video, I showed you my portal gun, which could only create portals and teleport the player to the location, and set the players forward vector accordingly. I now have managed to add additional functionality:


  1. Portal Gun plays a sound when placing a portal
  2. Portal Gun will only place portals on surfaces with a specific material
  3. If the material does not match the specified material, it plays a sound to let the player know that the portal cannot be placed here.
  4. The velocity of the player now gets carried over when the player teleports!
Things left to do:
  1. Make it so that the portal spawns only in places where there is space. If there is no space to spawn, the portals keeps moving +1 to the left or right, depending on which line traces generate an overlap event. Not sure how I would go about doing this, but I'm going to try! Any tips would be greatly appreciated. (DONE)
  2. Improve the render target. (DONE)
  3. Add visual improvements, such as FX when shooting. (DONE)
  4. General fixes and improvements.
Tutorial Series up! You can visit the tutorial series on this page:


Unreal Academy Game Developer

I like to develop games and help other people achieve their dreams of Game Development as well! I hope you'll find my blog useful, and if you do, please do not forget to subscribe to me on YouTube and watch an ad to support me!

Portal Gun (WIP) Tutorial Coming Soon! | UE4


Work In Progress of Portal Gun in Unreal Engine 4! Some things that still need working on: 


  1. Upon teleport, player forward velocity should change according to the forward vector of Portal 2. Example: The player was moving at axis X, and when teleported to Portal 2, his forward axis became Y, while his side axis became X. To preserve the momentum, I'm trying to change player velocity to forward vector of Portal 2. This will allow the player to move at the same speed forward upon teleporting to Portal 2. DONE
  2. Spawn the Portal only where it fits. This will be done by line tracing the sides of the portal + the center to see if it overlaps anything. If it does, we're going to move the portal to the left/right till it stops overlapping! DONE
  3. Make the render target look better. DONE
  4. Teleport player as soon as the portal is created. Right now, it uses event overlap to detect overlapping actors and then teleports the overlapping actors. If the player places the portal directly below him, the overlap event will not trigger unless the player moves away from the trigger and steps on it again. DONE
All issues have been solved, visit the Portal Gun Playlist to find the tutorial!

Portal Tutorial Series | Unreal Academy


Unreal Academy Game Developer

I like to develop games and help other people achieve their dreams of Game Development as well! I hope you'll find my blog useful, and if you do, please do not forget to subscribe to me on YouTube and watch an ad to support me!

Raytrace Optimization - Creating RT Triggers, Setting Up Level Streaming - Part 2 | UE4


Hello guys, in this video I tell you how to create a trigger blueprint, from which you will be able to turn on and off Raytrace Shadows, Raytrace Ambient Occlusion, Raytrace Global Illumination, and Raytrace Reflections in locations that you want them on or off.
Then I tell you how to set up level streaming, to load and unload specific maps in your level of Unreal Engine 4, thus increasing the FPS substantially!

Timestamps:
Quick Overview: 00:00
Enabling/Disabling Raytrace Setting via Trigger Blueprint: 00:50
Setting Up Level Streaming: 06:35


Unreal Academy Game Developer

I like to develop games and help other people achieve their dreams of Game Development as well! I hope you'll find my blog useful, and if you do, please do not forget to subscribe to me on YouTube and watch an ad to support me!

Raytrace Optimization - Creating RT Toggle Widget, Setting Up RT Lights & Tips - Part 1 | UE4


Hello guys, in this video I give you a quick overview of the different types of Raytracing, tell you how to create an RT toggle button, from which you will be able to turn on and off Raytrace Shadows, Raytrace Ambient Occlusion, Raytrace Global Illumination, and Raytrace Reflections.
Then I tell you about some tips about how to decide which RT setting to enable in which part of your level, and reasons why you should not enable multiple RT settings.
After that I tell you about how to increase FPS when Raytrace shadows are turned on, which is done by disabling "Cast Raytraced Shadows" in all the unnecessary lights.
I also tell you how to remove the "Harsh" shadows that might appear if you enable multiple RT lights in one scene, or if you enable RT Lights that cast RT Shadows in conjunction with normal light.

Timestamps:
Quick Overview: 0:10
Types Of Raytracing and Their Usage: 0:50
Creating a Widget to Toggle Raytracing via buttons: 2:50
How to chose which RT Setting to enable: 10:30
How to increase FPS when RT Shadows is turned on: 15:15
How to remove Harsh shadow effect when you use RT Shadows: 19:10
End of video (Snippet of wonders of level streaming): 23:25


Unreal Academy Game Developer

I like to develop games and help other people achieve their dreams of Game Development as well! I hope you'll find my blog useful, and if you do, please do not forget to subscribe to me on YouTube and watch an ad to support me!

Raytracing On GTX 1060 - No Optimization vs Mild Optimization vs High Optimization


Hey guys, In this video I show you what wonders optimization can do to your game! Basically, without any optimization, your games FPS can fall down to 10FPS, but with optimization, you can play at 45-60 FPS with raytracing, on a GTX 1060!


There are three levels of Optimization: 
  1. No Optimization - Raytracing is enabled everywhere, this causes severe FPS drop, down to 10FPS. 
  2. Mild Optimization - Raytracing is enabled everywhere, but lights turn off when they are not near the player. This means that Raytraced Shadows and AO do not have to be calculated, thus increasing FPS. 
  3. High Optimization - Only Raytracing methods that make a difference are enabled. So for example, if RT Ambient Occlusion makes the room look better than RT Shadows, then I just turn on RT AO and turn off every other RT method. Another thing I do is that I unload a part of the level that is not visible to the player. So when the player goes inside another room, the room that he was previously in unloads, causing a drop in RT calculations and an increase in FPS. 

Unreal Academy Game Developer

I like to develop games and help other people achieve their dreams of Game Development as well! I hope you'll find my blog useful, and if you do, please do not forget to subscribe to me on YouTube and watch an ad to support me!

How to enable & Optimize Raytracing | UE4


Hey guys, in this tutorial, I show you how to enable Raytracing, as well as how to optimize it, as well as the different raytracing settings that you can enable, such a raytraced AO, raytraced shadows, raytraced reflections, and raytraced global illumination. I show you how to enable and disable the different raytrace settings! For more in-depth details about raytracing techniques, check out this article here:

Unreal Academy Game Developer

I like to develop games and help other people achieve their dreams of Game Development as well! I hope you'll find my blog useful, and if you do, please do not forget to subscribe to me on YouTube and watch an ad to support me!

Raytracing Techniques GTX 1060 - Global Illumination vs Reflections vs Shadows vs Ambient Occlusion


Hey guys, In this video, I show you different raytracing techniques, such as Raytraced Global Illumination, Raytraced Reflections, Raytraced Shadows, and Raytraced Ambient Occlusion. I show what difference they make in terms of visual quality as well as in terms of FPS. This is all running on a GTX 1060, so FPS are quite low, and might increase with a better GPU.

----------------------------
Time Stamps:
Raytraced Shadows On: 0:11
Raytraced Shadows Off: 0:21
Raytraced Shadows On vs Off: 0:31
Raytraced Reflections On: 0:41
Raytraced Reflections Off: 0:52
Raytraced Reflections On vs Off: 1:02
Raytraced Global Illumination On: 1:12
Raytraced Global Illumination Off: 1:22
Raytraced Global Illumination On vs Off: 1:32
Raytraced Ambient Occlusion: 1:42
Traditional Ambient Occlusion: 1:52
Raytraced Ambient Occlusion vs Traditional Ambient Occlusion: 2:02
Raytraced Shadows Closeup (On): 2:12
Raytraced Shadows Closeup (Off): 2:22

For a more in-depth video, please go to this article:
Unreal Academy Game Developer

I like to develop games and help other people achieve their dreams of Game Development as well! I hope you'll find my blog useful, and if you do, please do not forget to subscribe to me on YouTube and watch an ad to support me!

Volumetric Fog And Particles | UE4


End Result Of Tutorial!
Hey guys! In this tutorial, I show you how to apply the volumetric light effect, as well as how to put some particles in your scene and where to get them! I tell you the Do's and Don'ts of setting up volumetric light, where it really shines, and how to use particle effects to really make the scene look beautiful! I hope you guys like this video!


Unreal Academy Game Developer

I like to develop games and help other people achieve their dreams of Game Development as well! I hope you'll find my blog useful, and if you do, please do not forget to subscribe to me on YouTube and watch an ad to support me!

Creating a One Way/Two Way Door BP | UE4


Hey guys! In this tutorial, I create a door that opens both ways using blueprints! In the start, I show how to make a door open automatically when the player is near the door. Then, I showed how to open the door only when the player presses use key, i.e presses "E". 

Then, I expanded on it and showed how to make the door open both ways, in case you guys wanted to create a door that opens both ways! I hope you guys will enjoy this tutorial, and please like, share and subscribe for more videos!

Unreal Academy Game Developer

I like to develop games and help other people achieve their dreams of Game Development as well! I hope you'll find my blog useful, and if you do, please do not forget to subscribe to me on YouTube and watch an ad to support me!

Creating a Basic Room - Lightning - Creating Door and Window | UE4


Hey guys! In today's tutorial, I'll create a basic room, place some props, add lightning as well as tell some tips about how to light up a small room, tell about how to subtract an area from a BSP to make a door and a Window, as well as tell about how to set up collisions, change textures on Static Meshes, and how to place actors in your scene! All assets used are already included in Unreal Engine 4!

Unreal Academy Game Developer

I like to develop games and help other people achieve their dreams of Game Development as well! I hope you'll find my blog useful, and if you do, please do not forget to subscribe to me on YouTube and watch an ad to support me!

Unreal Engine 4 - Basics - Installations, Start Up, UI


Hey guys! In this video, I tell you about the basics of Unreal Engine 4! In it, I tell all about how to download Unreal Engine, how to navigate the Epic Games Client, and the different tabs and sections present in the Epic Games Client. I then open UE4 and tell about the general UI as well as the things that UE4 can do, such as Vertex painting, Landscape Editing, Foliage Placing, and Geometry Editing! I tell about the different types of lights. I also tell about the advantages of using BSP over Static Mesh and vice versa. I tell about Blueprints and how they will help you make designing the level much easier thanks to global changing. I hope you guys liked this tutorial! Please do like, share and subscribe!

Unreal Academy Game Developer

I like to develop games and help other people achieve their dreams of Game Development as well! I hope you'll find my blog useful, and if you do, please do not forget to subscribe to me on YouTube and watch an ad to support me!